Cinematic Videos
Most people do not fail at the AI. They fail at the craft in front of it. Which shot, which light, which cut. That is the craft the Story agent in Pollo AI handles for you. You hand it an image and a scene, and it returns a script, the camera work, and the finished cut.
Step 1: Open the agent in Pollo AI
Open Pollo AI and go to Agents in the menu. Pick Story Video. This is the mode that turns your images into a planned-out video, not just a single clip.
Your first step: Create an account, open Agents, select Story Video.
Step 2: Upload your images
Now you upload your source material:
- A few character images, or better a full character sheet, so the figure stays consistent
- Ideally a scene, meaning the image that sets the look and the situation
The clearer your input, the better the interpretation. A character sheet with several angles beats a single photo.
Your first step: Prepare a character sheet plus one scene image and upload both.
Step 3: Review and adjust the interpretation
The agent analyzes your images and hands back its interpretation. It reads your style and proposes how to translate it cinematically: framing, camera movement, lighting.
This is where you step in. Go through the suggestions, change a few settings, sharpen the direction. You set the guardrails, the agent does the execution.
Your first step: Read the suggestions, deliberately adjust one or two settings.
Step 4: Hit Go and let it generate
Once the direction fits, you click Go. From here the agent works on its own. It generates the individual shots and edits them into a finished video at the end. You do not get raw footage to assemble yourself, you get a finished cut.
Your first step: Press Go and let one full run complete.
Step 5: Trace it and learn
This is the part that goes beyond a plain video generator. You can trace what the agent did: which shot it chose, which light, which transition. If you know nothing about camera work, you learn as you go. After a few runs you start to understand why a close-up lands here and a wide shot lands there.
Your first step: After the render, walk through the agent's decisions and note one thing you want to call yourself next time.
The inputs I used
So you can see what I fed into step 2, here are my three inputs and the exact prompts behind them. I built the character and the scene with Midjourney, and derived the character sheet from the character image.
The character
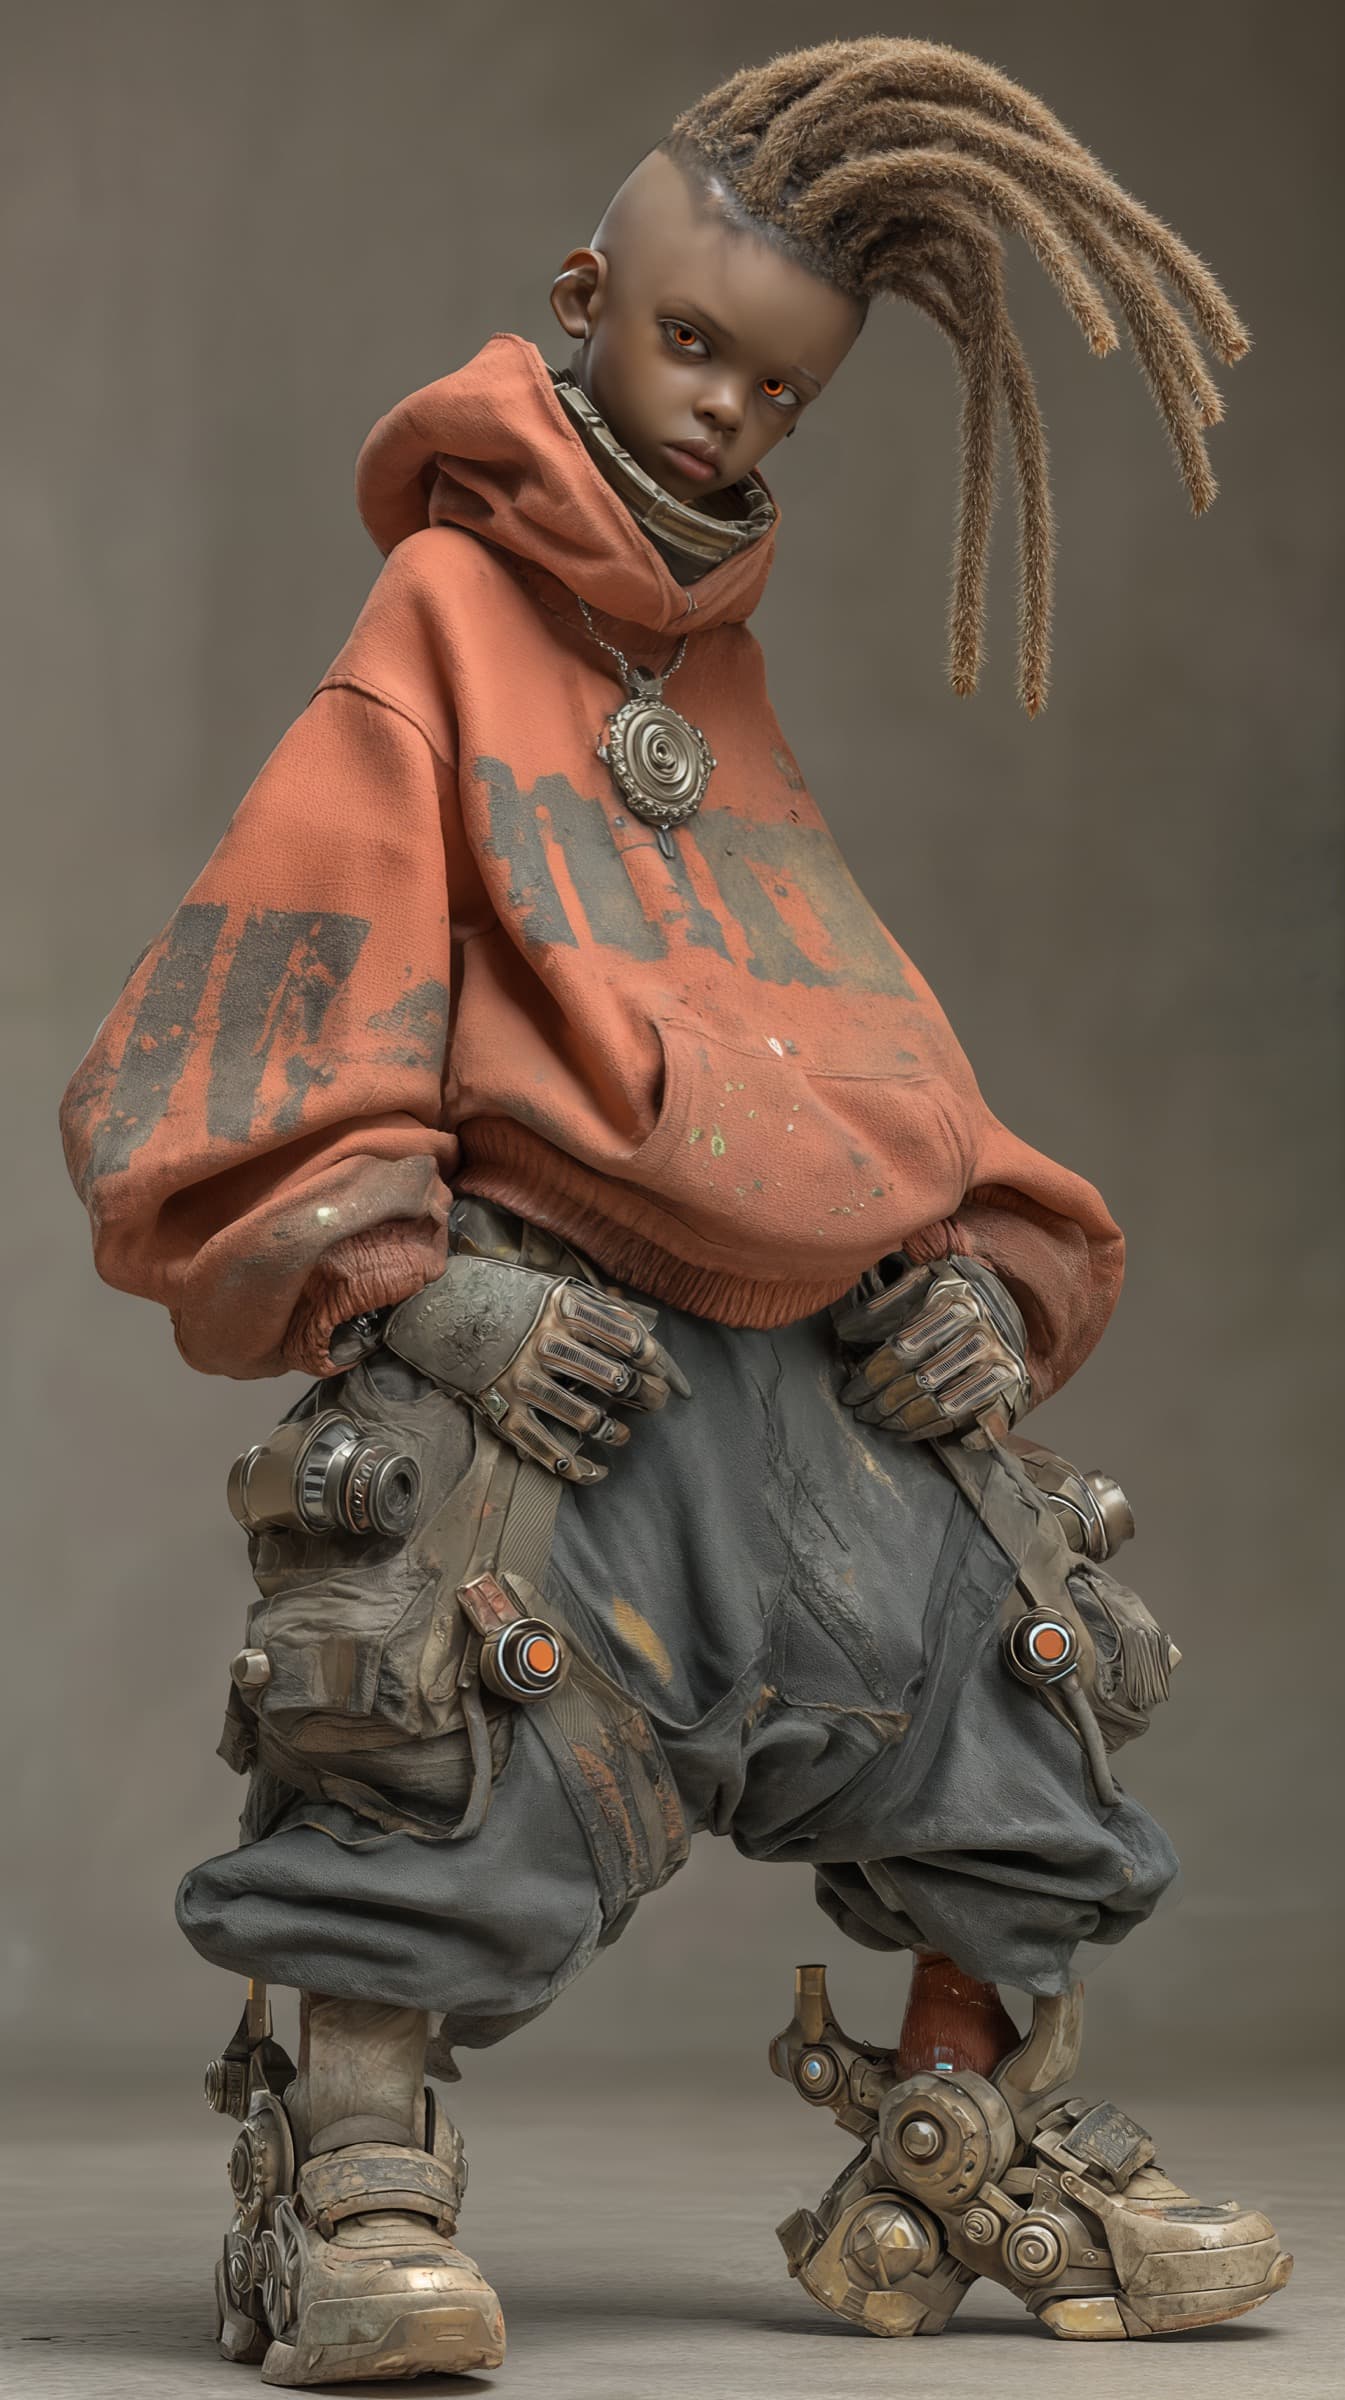
This is my source image. Midjourney prompt:
Full-body shot of a 11 year old boy character in 3D animation style, standing in a clean, softly lit studio with neutral background, afro-futurist streetwear: oversized orange hoodie with paint splatters, dark cargo pants, fingerless gloves, small tool belt, short dreadlocks braided into a single thick strand with neon fiber woven in, warm brown skin tone, expressive eyes, youthful proportions, cinematic soft global illumination, high-quality character design, subtle rim lighting
The character sheet
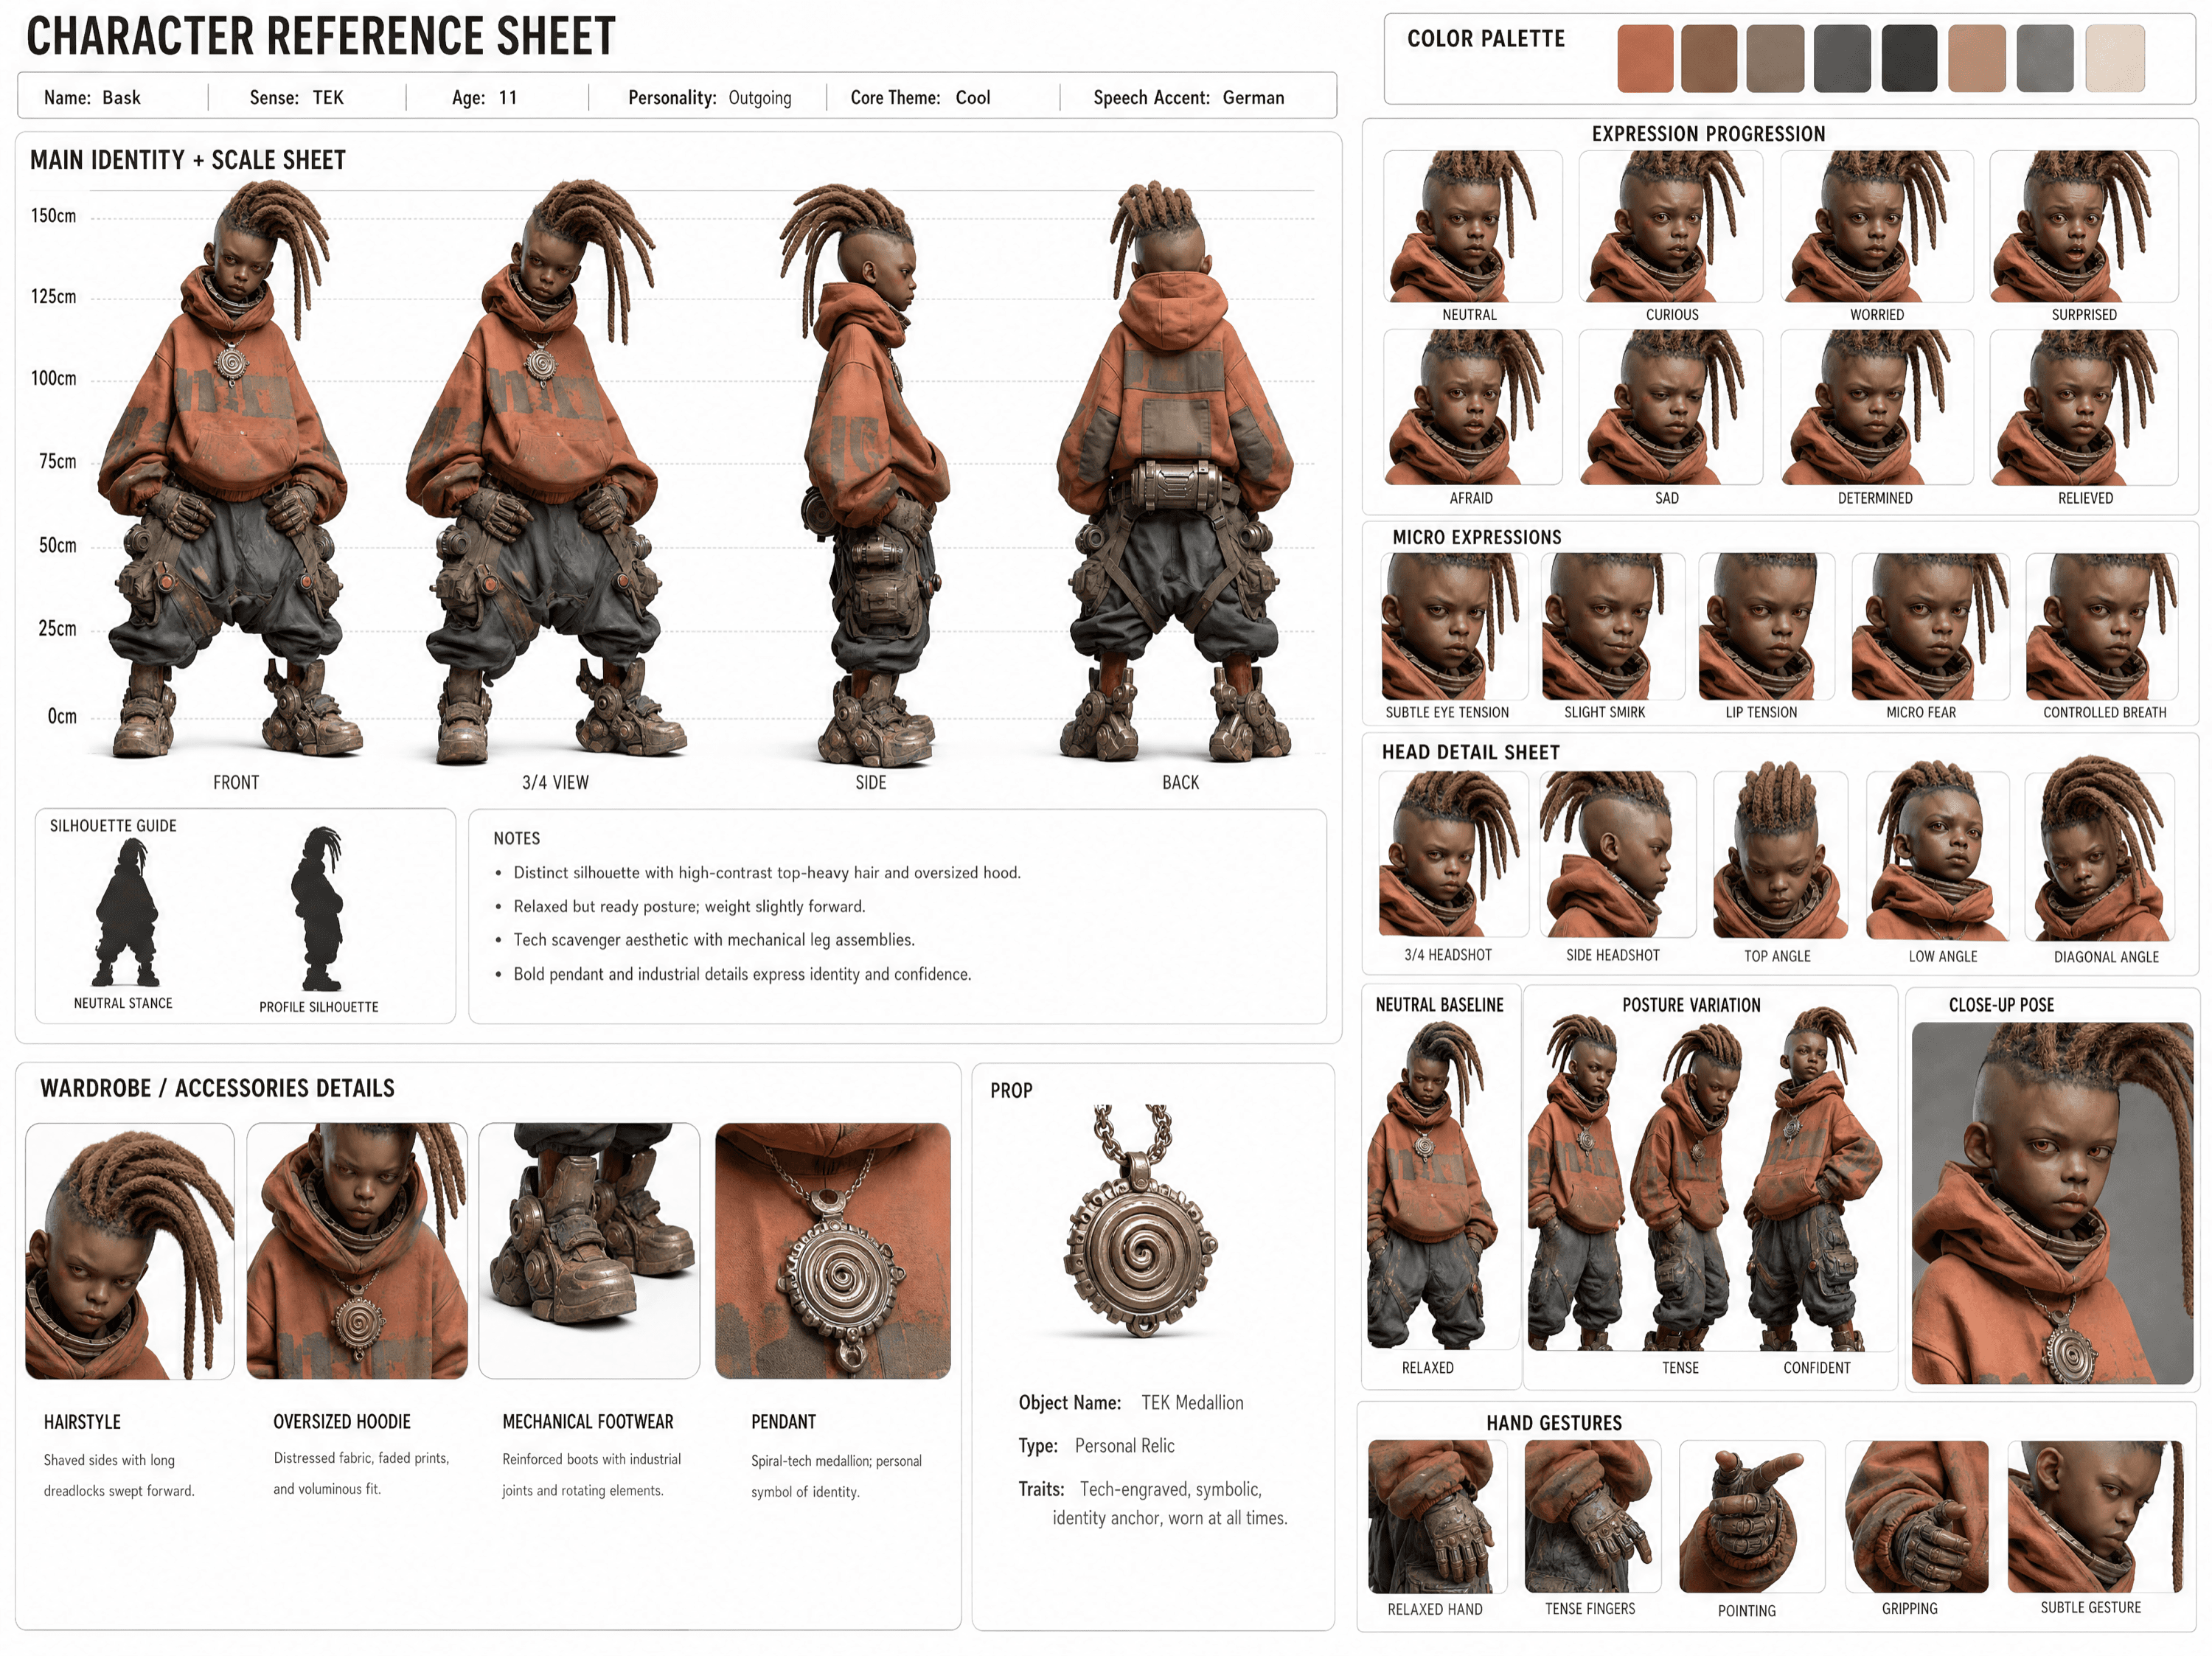
I turned the character image into a full reference sheet. I made it with GPT Image 2, which is also available directly on Pollo.ai. You can reuse the prompt as is, @[Image 1] is your character image:
Create a single unified MASTER CHARACTER REFERENCE SHEET from these inputs:
[STYLE]:  stylized 3d
[SUBJECT_DESCRIPTION]: @[Image 1](image_1)
Instruction:
Create the board in a 4:3 horizontal layout. The board layout, background, typography and spacing must be clean, neutral, minimal and technical, on a pure white or clean off-white background. Use clear section titles, readable English labels, balanced spacing, no clutter, no watermark, no logo. Apply [STYLE] only to the character and visual elements, not to the board layout or UI. All text must be clearly readable at normal viewing size. Avoid tiny or dense text. Infer all missing details from the subject description, including name, alias if suitable, role, age, personality, core theme, accent, wardrobe details, accessories, key prop if clearly relevant, visual notes and a fitting color palette.
Use this layout:
top row = left: title + horizontal info block, right: COLOR PALETTE
center = large MAIN IDENTITY + SCALE SHEET as the biggest section
right = EXPRESSION PROGRESSION + HEAD DETAIL SHEET + NEUTRAL BASELINE + POSTURE VARIATION + CLOSE-UP POSE
bottom = WARDROBE / ACCESSORIES DETAILS + PROP + HAND GESTURES
Include:
Title: CHARACTER REFERENCE SHEET
1. TOP INFO BLOCK
Name: , Age: , Personality: , Core Theme: Cool, Language: English
2. COLOR PALETTE
Place this in the top-right header area.
Show 6 to 8 minimal clean color swatches that match the subject's style, wardrobe, world and mood. Don't add labels.
3. MAIN IDENTITY + SCALE SHEET
This must be the largest and most prominent section.
Show the subject only, with no prop, no bag, no handheld object, no extra item interaction.
Show:
Front, 3/4 View, Side, Back
Place the character views over subtle measurement guide lines, like a clean model sheet scale background with height marks.
Also include a small SILHOUETTE GUIDE inside this same section:
2 small clean silhouette thumbnails, Neutral Stance and Profile Silhouette.
Keep the silhouettes small and secondary, placed in a corner of the MAIN IDENTITY + SCALE SHEET.
The subject should appear in a clean neutral presentation focused only on identity, body shape, outfit, silhouette and proportions.
Add a few small notes for silhouette, posture, special traits, visual identity.
4. EXPRESSION PROGRESSION
Show exactly 8 panels of the same subject:
Neutral, Curious, Worried, Surprised, Afraid, Sad, Determined, Relieved
MICRO EXPRESSIONS
Show exactly 5 panels of the same subject:
subtle eye tension, slight smirk, lip tension, micro fear, controlled breath
These panels should function as both an expression sheet and a light emotional progression.
5. HEAD DETAIL SHEET
Show several close-up head references of the same subject from different angles:
3/4 Headshot, Side Headshot, Top Angle, Low Angle, Diagonal Angle
Keep facial structure, hairstyle, eyes, proportions and identity fully consistent.
6. NEUTRAL BASELINE
1 panel: fully relaxed, no emotion
7. POSTURE VARIATION
2-3 panels: relaxed, tense, confident
8. CLOSE-UP POSE
Show exactly 1 cinematic close-up pose of the same subject from chest-up or shoulder-up.
Use a natural expressive pose that best fits the subject's personality and story tone.
This close-up should clearly show facial identity, hairstyle, expression, upper wardrobe detail and emotional presence.
9. WARDROBE / ACCESSORIES DETAILS
Show exactly 4 close-up callouts for important styling details such as hairstyle, outerwear, footwear, accessories, fabric or material detail.
10. PROP
Only include this section if a prop is clearly important to the subject.
Show exactly 1 single clean isolated image of the prop only.
Add a small info block:
Object Name, Type, Traits
11. HAND GESTURES
relaxed hand, tense fingers, pointing, gripping, subtle gesture near face
Keep the subject fully consistent across all panels. The MAIN IDENTITY + SCALE SHEET must visually dominate the board. The final image should look like a premium production visual bible / character continuity sheet matching the selected [STYLE].
The scene
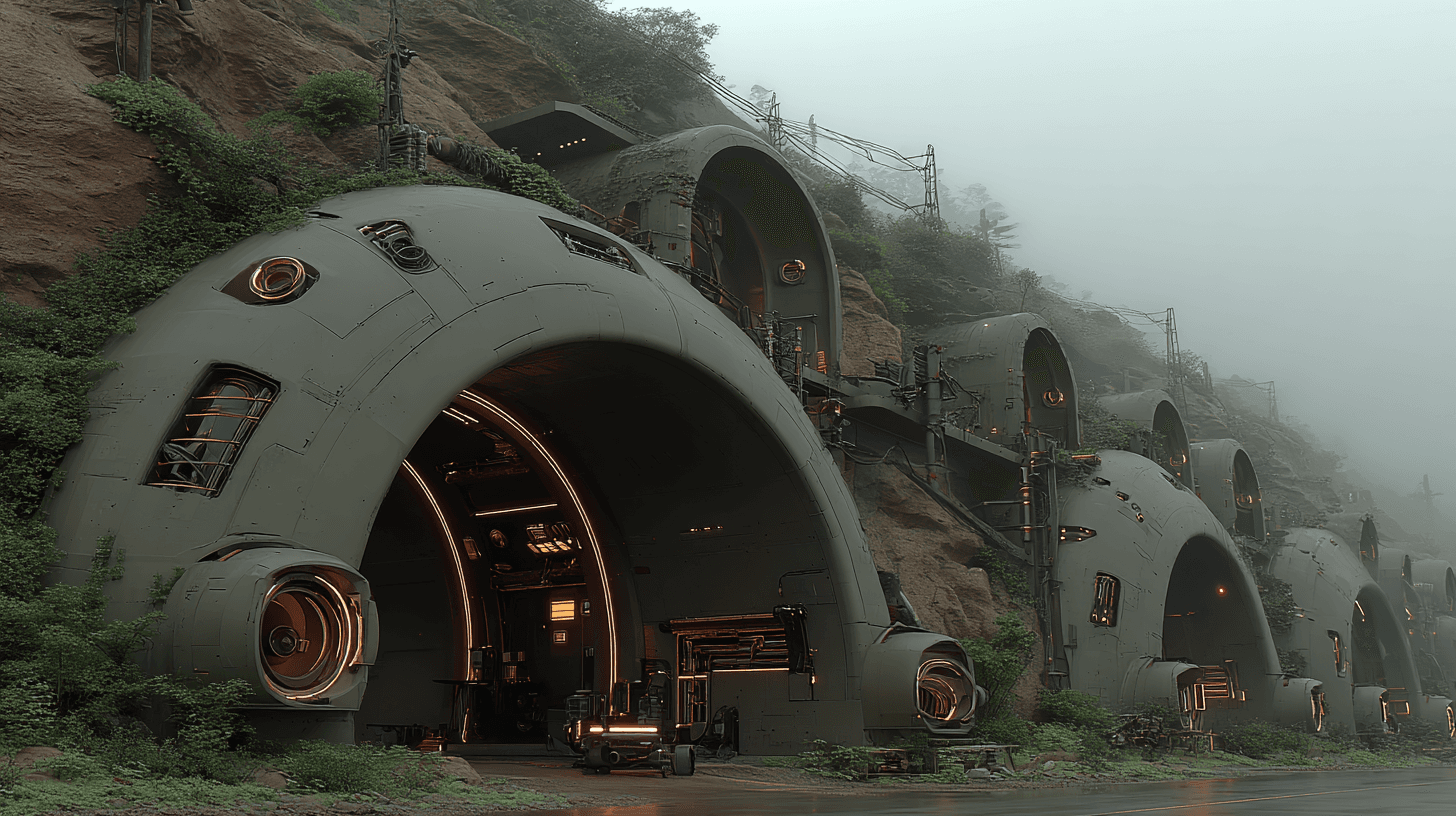
The scene sets the look and situation for the video. Midjourney prompt:
deep stone cyberpunk workshop carved into the mountain, multiple unfinished energy strings resembling a laser whip, in various states of construction - geodesic interlocking lattices of brushed iron alloy with embedded copper-tone coil work, each whip approximately 5 meters in lenght fixed in articulated stone-and-iron rigs, no digital interfaces only mechanical gauges and engraved tolerance markings, photographic realism, anamorphic medium shot
Common mistakes
- A single photo instead of a character sheet. The figure turns inconsistent from shot to shot. Several angles give the agent something to hold on to.
- No scene attached. Without a scene image the agent guesses the look. With one it has a clear brief.
- Hitting Go without checking the interpretation. The proposal is a starting point, not a final result. Two minutes of tuning save you a full wasted run.
- Only consuming the output. The real value sits in tracing it. Take just the finished video and you throw away the learning.
Next Steps
- Open Pollo AI and run a free test with one character
- Prepare a character sheet, several angles of the same figure
- Add a scene image for look and situation
- Start the first run and step into the interpretation on purpose
- Walk through the agent's decisions and set one of them yourself next time