Kinoreife Videos
Die meisten scheitern nicht an der KI, sondern am Handwerk davor. Welche Einstellung, welches Licht, welcher Schnitt. Genau dieses Handwerk nimmt dir der Story-Agent bei Pollo AI ab. Du gibst ihm ein Bild und eine Szene, er liefert dir Skript, Kameraführung und den fertigen Cut.
Schritt 1: Zum Agenten in Pollo AI
Öffne Pollo AI und geh im Menü auf Agents. Dort wählst du Story Video aus. Das ist der Modus, der dir aus deinen Bildern ein durchgeplantes Video generiert, nicht nur einen einzelnen Clip.
Dein erster Step: Account anlegen, Agents öffnen, Story Video auswählen.
Schritt 2: Bilder hochladen
Jetzt lädst du deine Ausgangsbilder hoch:
- Ein paar Charakterbilder oder gleich ein ganzes Character Sheet, damit die Figur konsistent bleibt
- Idealerweise eine Szene, also das Bild, das den Look und die Situation vorgibt
Je klarer dein Ausgangsmaterial, desto besser die Interpretation. Ein Character Sheet mit mehreren Ansichten schlägt ein einzelnes Foto.
Dein erster Step: Character Sheet plus ein Szenenbild bereitlegen und hochladen.
Schritt 3: Interpretation prüfen und anpassen
Der Agent analysiert deine Bilder und gibt dir seine Interpretation zurück. Er liest deinen Stil aus und schlägt vor, wie sich das cineastisch umsetzen lässt: Bildausschnitt, Kamerabewegung, Licht.
Das ist der Moment, in dem du eingreifst. Geh die Vorschläge durch, dreh an den Einstellungen, schärf die Richtung. Du gibst die Leitplanken, die Ausführung kommt vom Agenten.
Dein erster Step: Vorschläge lesen, ein bis zwei Einstellungen bewusst anpassen.
Schritt 4: Go klicken und generieren lassen
Wenn die Richtung passt, klickst du auf Go. Ab hier arbeitet der Agent allein: Er generiert die einzelnen Shots und schneidet sie am Ende zu einem fertigen Video zusammen. Am Ende steht ein fertiger Cut, kein Rohmaterial zum Selberbasteln.
Dein erster Step: Go drücken und den Durchlauf einmal komplett laufen lassen.
Schritt 5: Nachverfolgen und lernen
Das ist der Teil, der über einen reinen Video-Generator hinausgeht. Du kannst nachvollziehen, was der Agent gemacht hat: welche Einstellung er gewählt hat, welches Licht, welchen Übergang. Wer keine Ahnung von Kameraführung hat, lernt hier Schritt für Schritt mit. Nach ein paar Durchläufen verstehst du, warum eine Nahaufnahme an dieser Stelle sitzt und die Totale an jener.
Dein erster Step: Nach dem Rendern die Entscheidungen des Agenten durchgehen und dir eine Sache merken, die du beim nächsten Mal selbst ansagst.
Meine Inputs zum Nachbauen
Damit du siehst, womit ich in Schritt 2 reingegangen bin: hier sind meine drei Inputs und die exakten Prompts dahinter. Charakter und Szene habe ich mit Midjourney gebaut, das Character Sheet aus dem Charakterbild abgeleitet.
Der Charakter
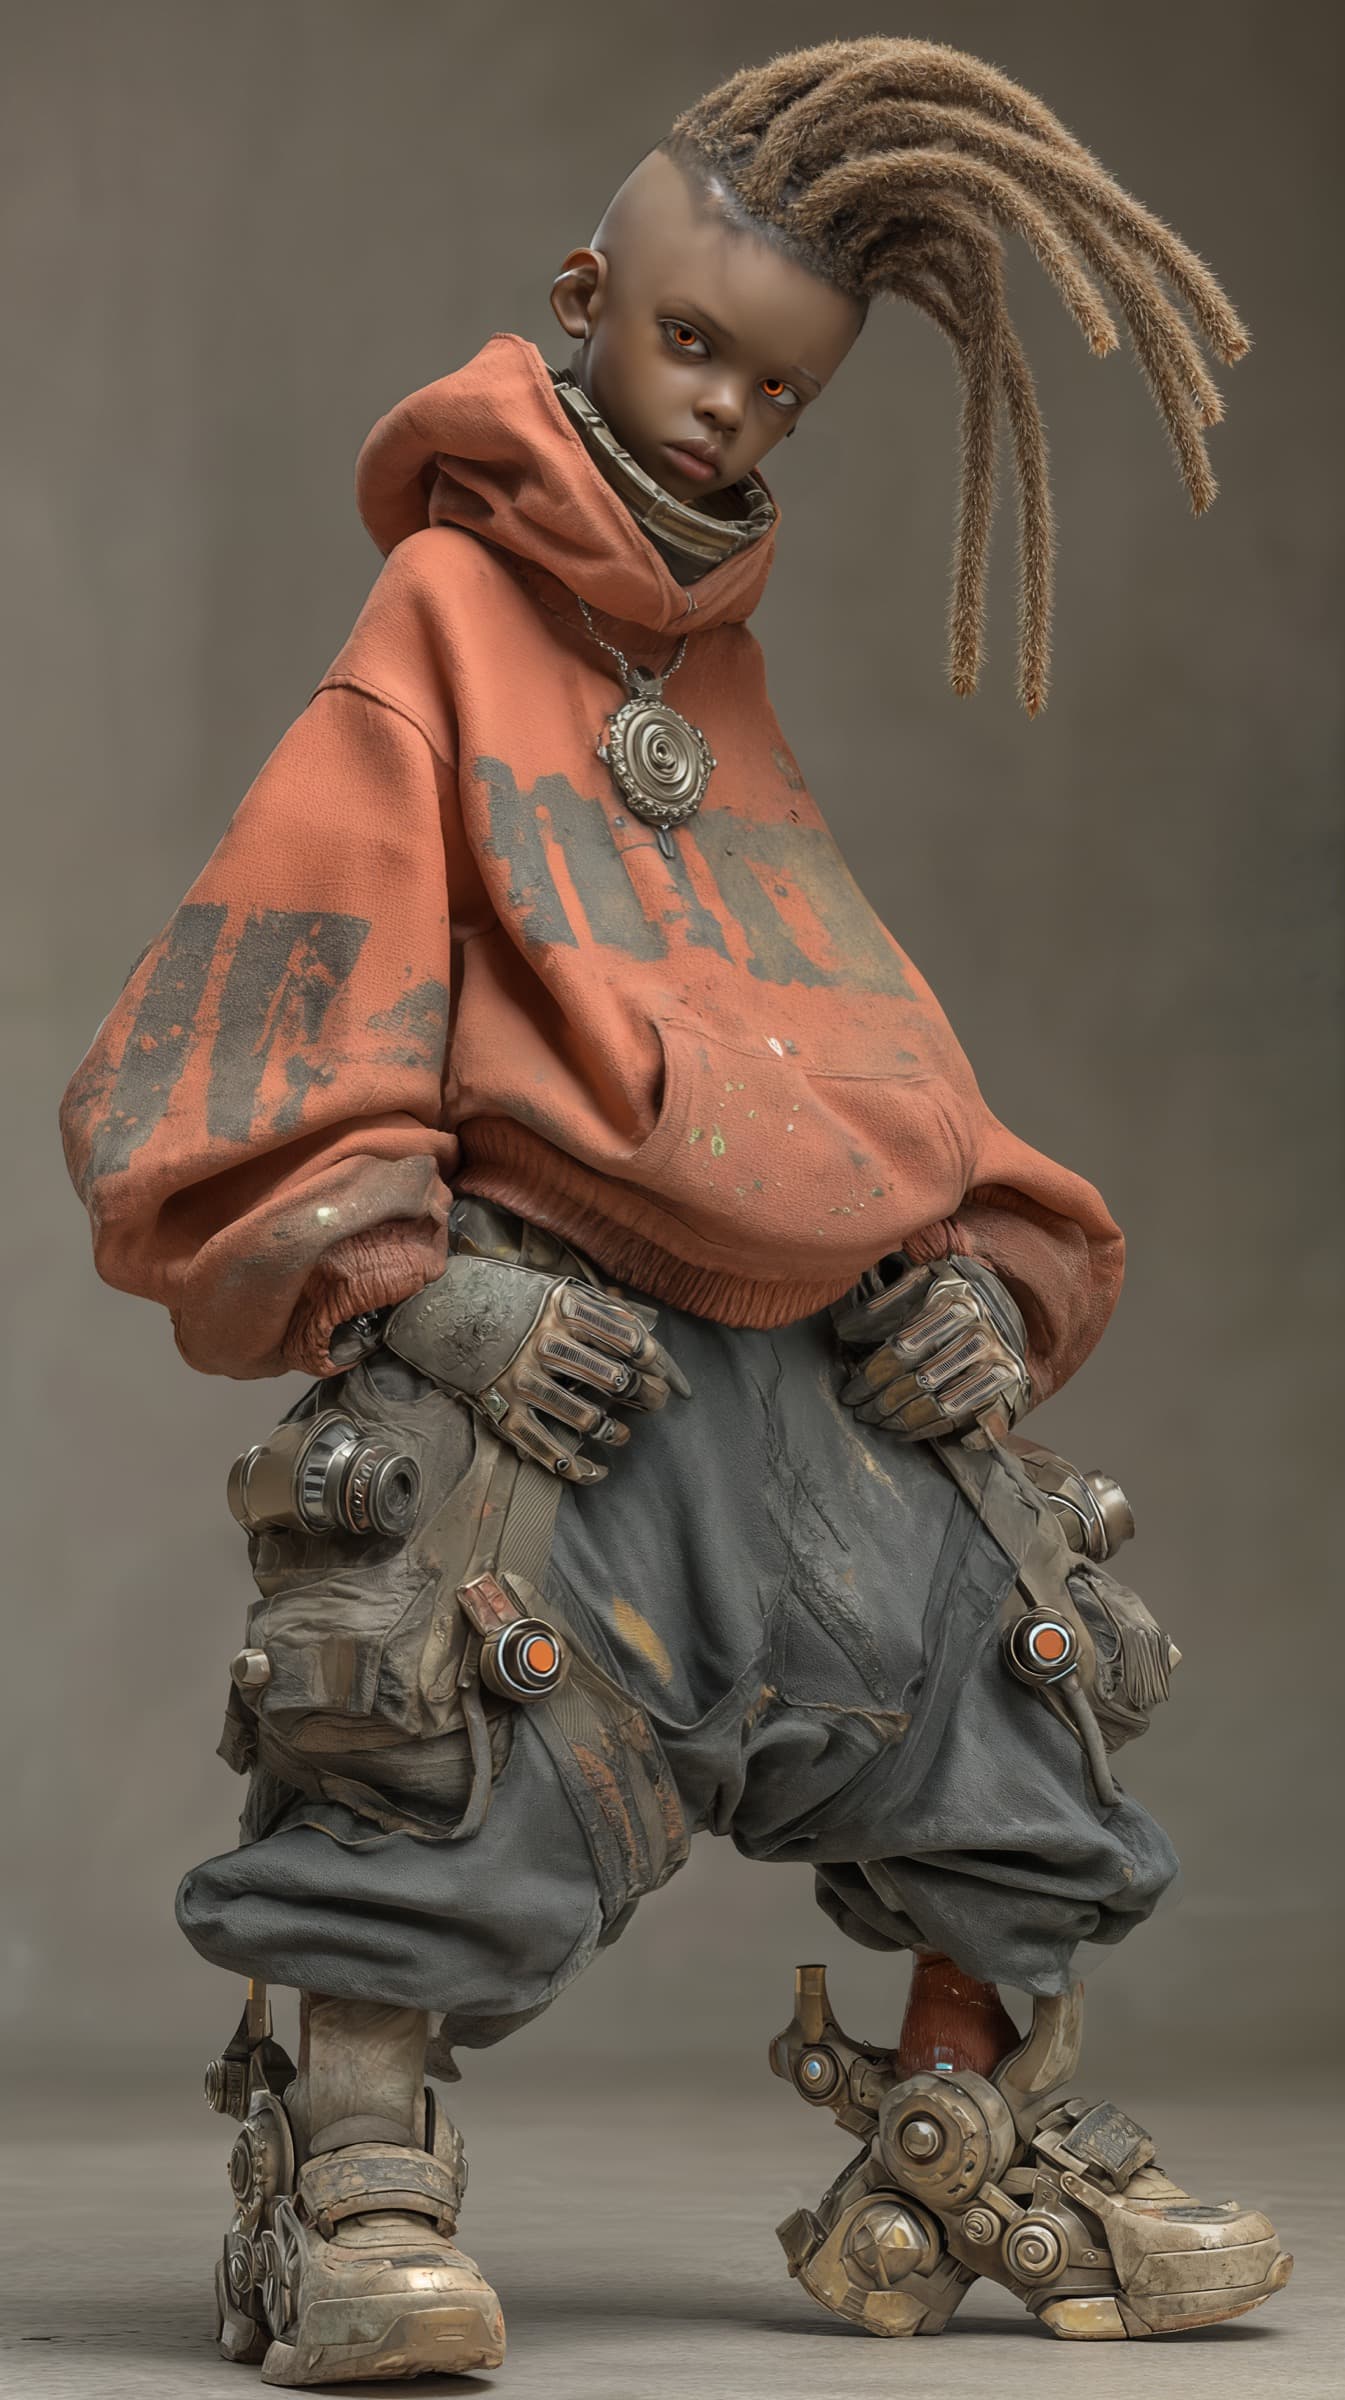
Das ist mein Ausgangsbild. Midjourney-Prompt:
Full-body shot of a 11 year old boy character in 3D animation style, standing in a clean, softly lit studio with neutral background, afro-futurist streetwear: oversized orange hoodie with paint splatters, dark cargo pants, fingerless gloves, small tool belt, short dreadlocks braided into a single thick strand with neon fiber woven in, warm brown skin tone, expressive eyes, youthful proportions, cinematic soft global illumination, high-quality character design, subtle rim lighting
Das Character Sheet
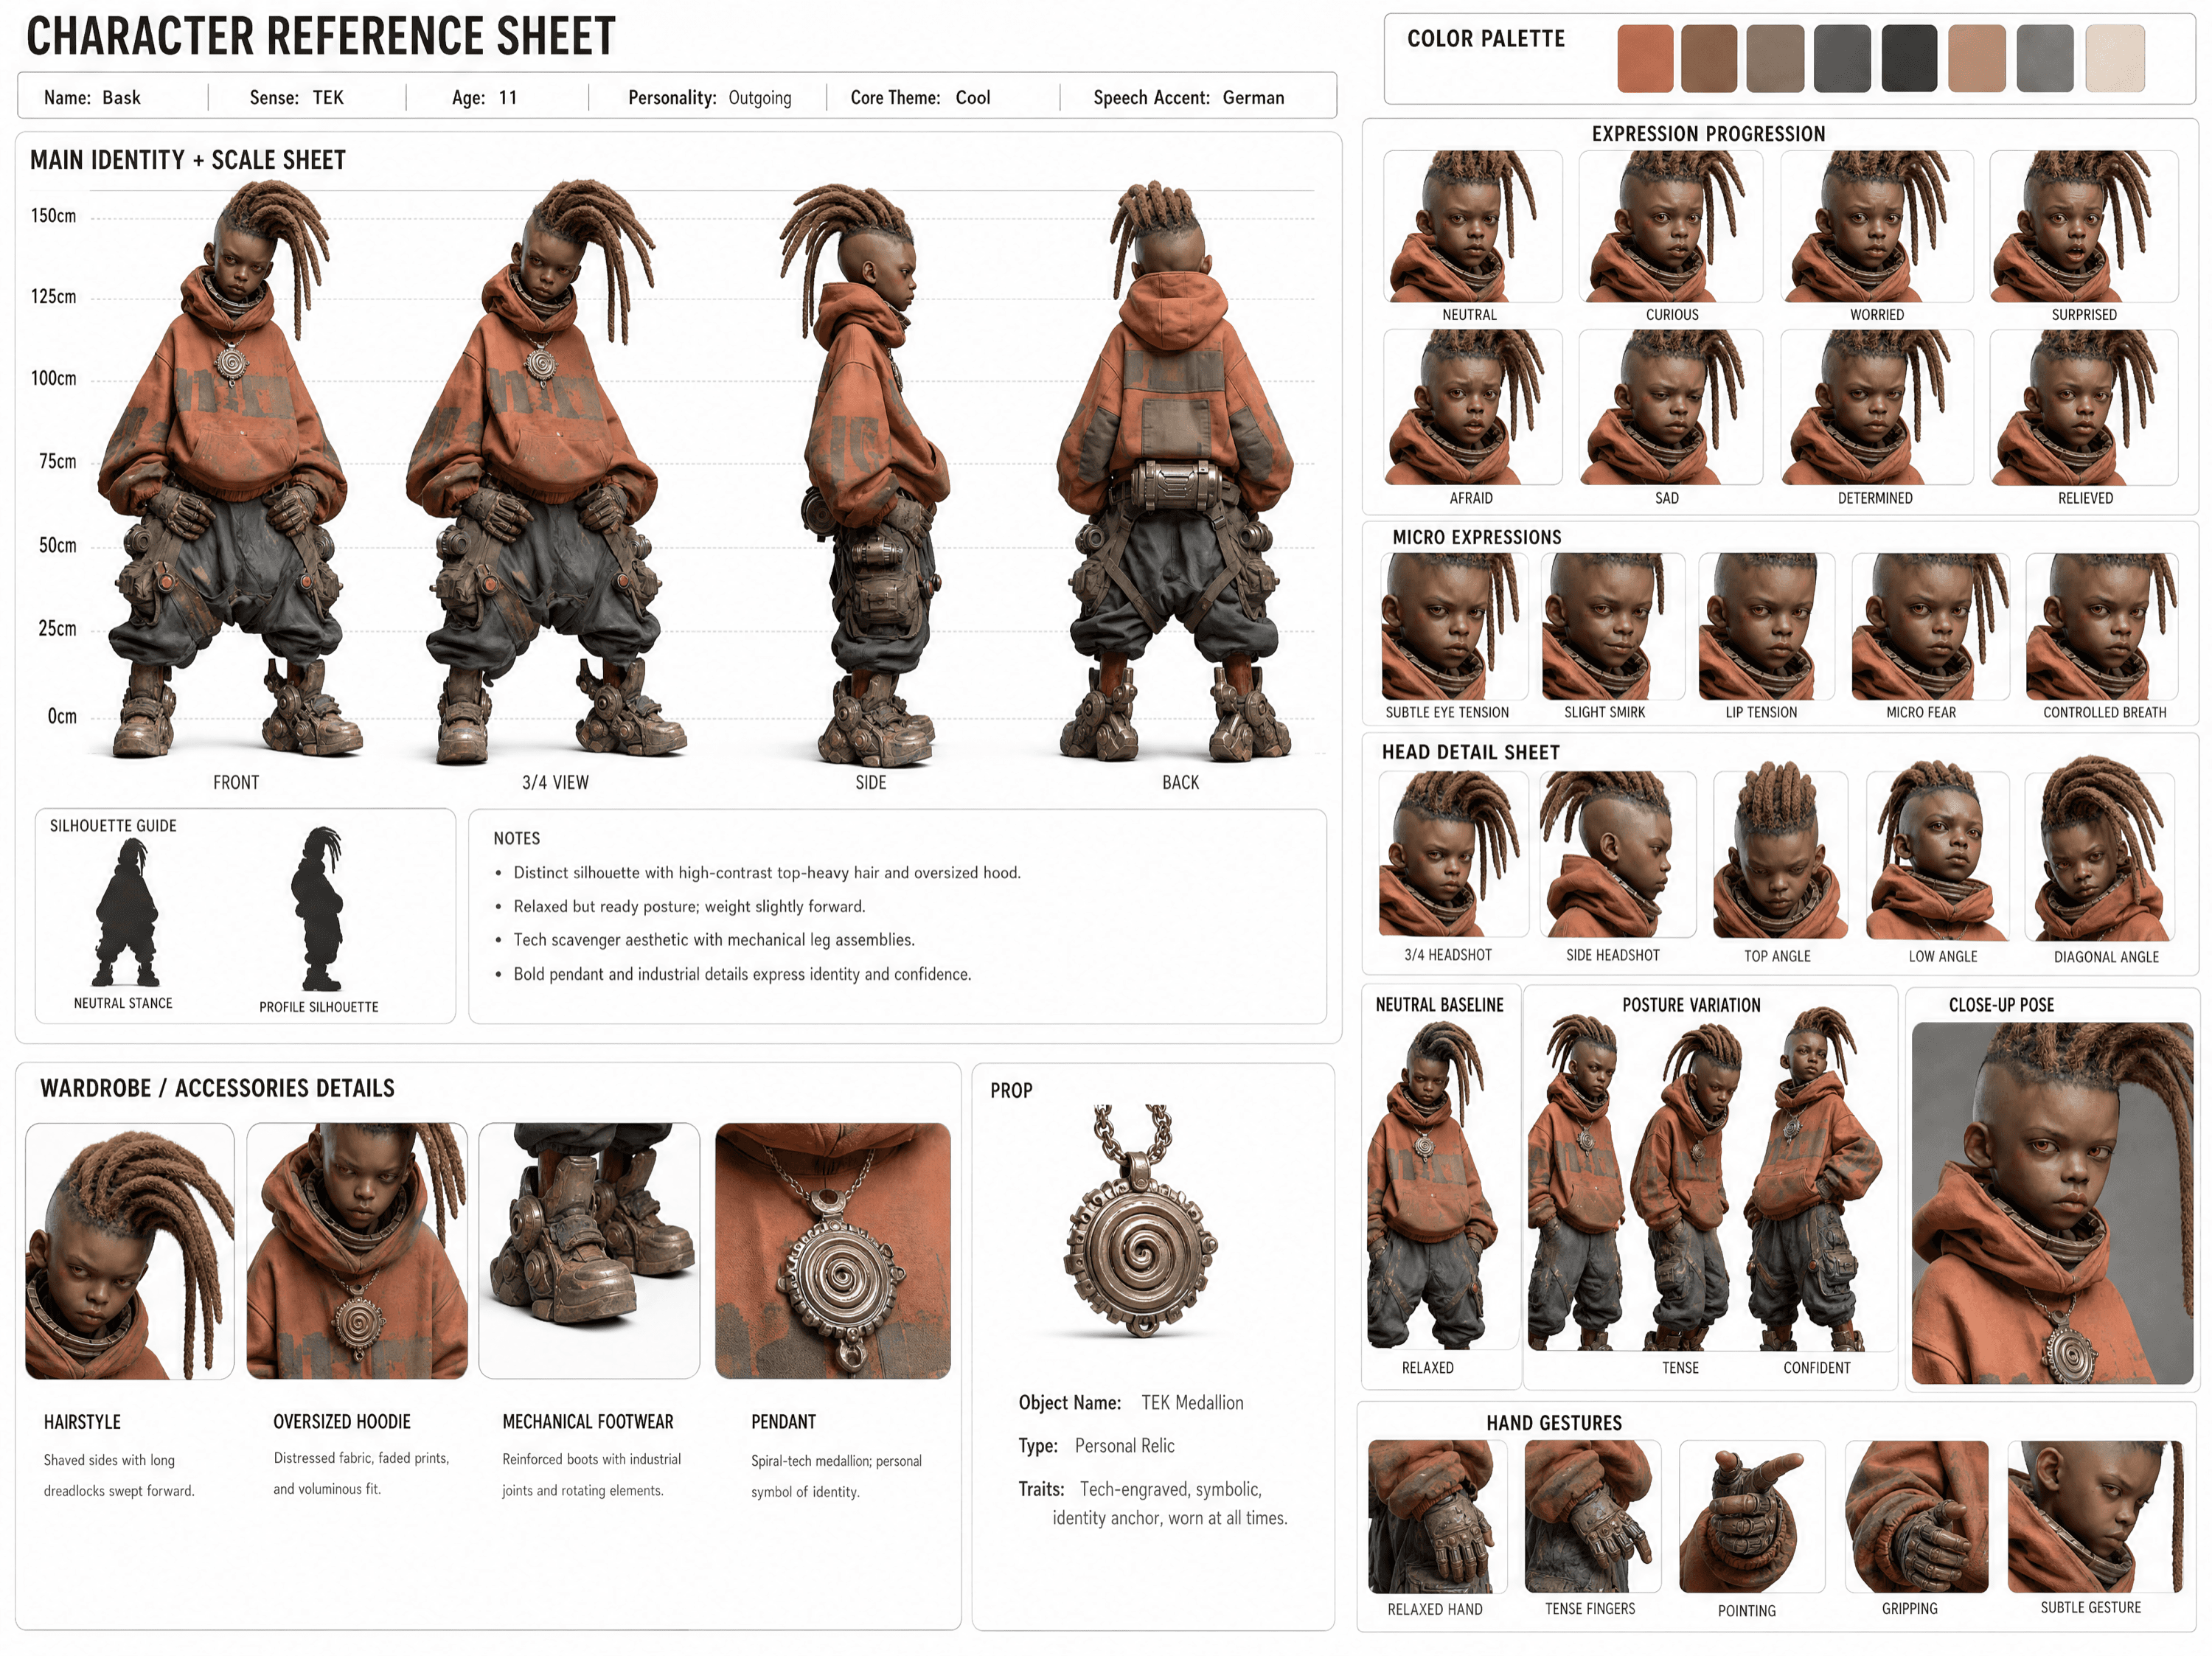
Aus dem Charakterbild habe ich ein komplettes Reference Sheet erzeugt. Gemacht mit GPT Image 2, das es auch direkt auf Pollo.ai gibt. Den Prompt kannst du 1:1 übernehmen, @[Image 1] ist dein Charakterbild:
Create a single unified MASTER CHARACTER REFERENCE SHEET from these inputs:
[STYLE]:  stylized 3d
[SUBJECT_DESCRIPTION]: @[Image 1](image_1)
Instruction:
Create the board in a 4:3 horizontal layout. The board layout, background, typography and spacing must be clean, neutral, minimal and technical, on a pure white or clean off-white background. Use clear section titles, readable English labels, balanced spacing, no clutter, no watermark, no logo. Apply [STYLE] only to the character and visual elements, not to the board layout or UI. All text must be clearly readable at normal viewing size. Avoid tiny or dense text. Infer all missing details from the subject description, including name, alias if suitable, role, age, personality, core theme, accent, wardrobe details, accessories, key prop if clearly relevant, visual notes and a fitting color palette.
Use this layout:
top row = left: title + horizontal info block, right: COLOR PALETTE
center = large MAIN IDENTITY + SCALE SHEET as the biggest section
right = EXPRESSION PROGRESSION + HEAD DETAIL SHEET + NEUTRAL BASELINE + POSTURE VARIATION + CLOSE-UP POSE
bottom = WARDROBE / ACCESSORIES DETAILS + PROP + HAND GESTURES
Include:
Title: CHARACTER REFERENCE SHEET
1. TOP INFO BLOCK
Name: , Age: , Personality: , Core Theme: Cool, Language: English
2. COLOR PALETTE
Place this in the top-right header area.
Show 6 to 8 minimal clean color swatches that match the subject's style, wardrobe, world and mood. Don't add labels.
3. MAIN IDENTITY + SCALE SHEET
This must be the largest and most prominent section.
Show the subject only, with no prop, no bag, no handheld object, no extra item interaction.
Show:
Front, 3/4 View, Side, Back
Place the character views over subtle measurement guide lines, like a clean model sheet scale background with height marks.
Also include a small SILHOUETTE GUIDE inside this same section:
2 small clean silhouette thumbnails, Neutral Stance and Profile Silhouette.
Keep the silhouettes small and secondary, placed in a corner of the MAIN IDENTITY + SCALE SHEET.
The subject should appear in a clean neutral presentation focused only on identity, body shape, outfit, silhouette and proportions.
Add a few small notes for silhouette, posture, special traits, visual identity.
4. EXPRESSION PROGRESSION
Show exactly 8 panels of the same subject:
Neutral, Curious, Worried, Surprised, Afraid, Sad, Determined, Relieved
MICRO EXPRESSIONS
Show exactly 5 panels of the same subject:
subtle eye tension, slight smirk, lip tension, micro fear, controlled breath
These panels should function as both an expression sheet and a light emotional progression.
5. HEAD DETAIL SHEET
Show several close-up head references of the same subject from different angles:
3/4 Headshot, Side Headshot, Top Angle, Low Angle, Diagonal Angle
Keep facial structure, hairstyle, eyes, proportions and identity fully consistent.
6. NEUTRAL BASELINE
1 panel: fully relaxed, no emotion
7. POSTURE VARIATION
2-3 panels: relaxed, tense, confident
8. CLOSE-UP POSE
Show exactly 1 cinematic close-up pose of the same subject from chest-up or shoulder-up.
Use a natural expressive pose that best fits the subject's personality and story tone.
This close-up should clearly show facial identity, hairstyle, expression, upper wardrobe detail and emotional presence.
9. WARDROBE / ACCESSORIES DETAILS
Show exactly 4 close-up callouts for important styling details such as hairstyle, outerwear, footwear, accessories, fabric or material detail.
10. PROP
Only include this section if a prop is clearly important to the subject.
Show exactly 1 single clean isolated image of the prop only.
Add a small info block:
Object Name, Type, Traits
11. HAND GESTURES
relaxed hand, tense fingers, pointing, gripping, subtle gesture near face
Keep the subject fully consistent across all panels. The MAIN IDENTITY + SCALE SHEET must visually dominate the board. The final image should look like a premium production visual bible / character continuity sheet matching the selected [STYLE].
Die Szene
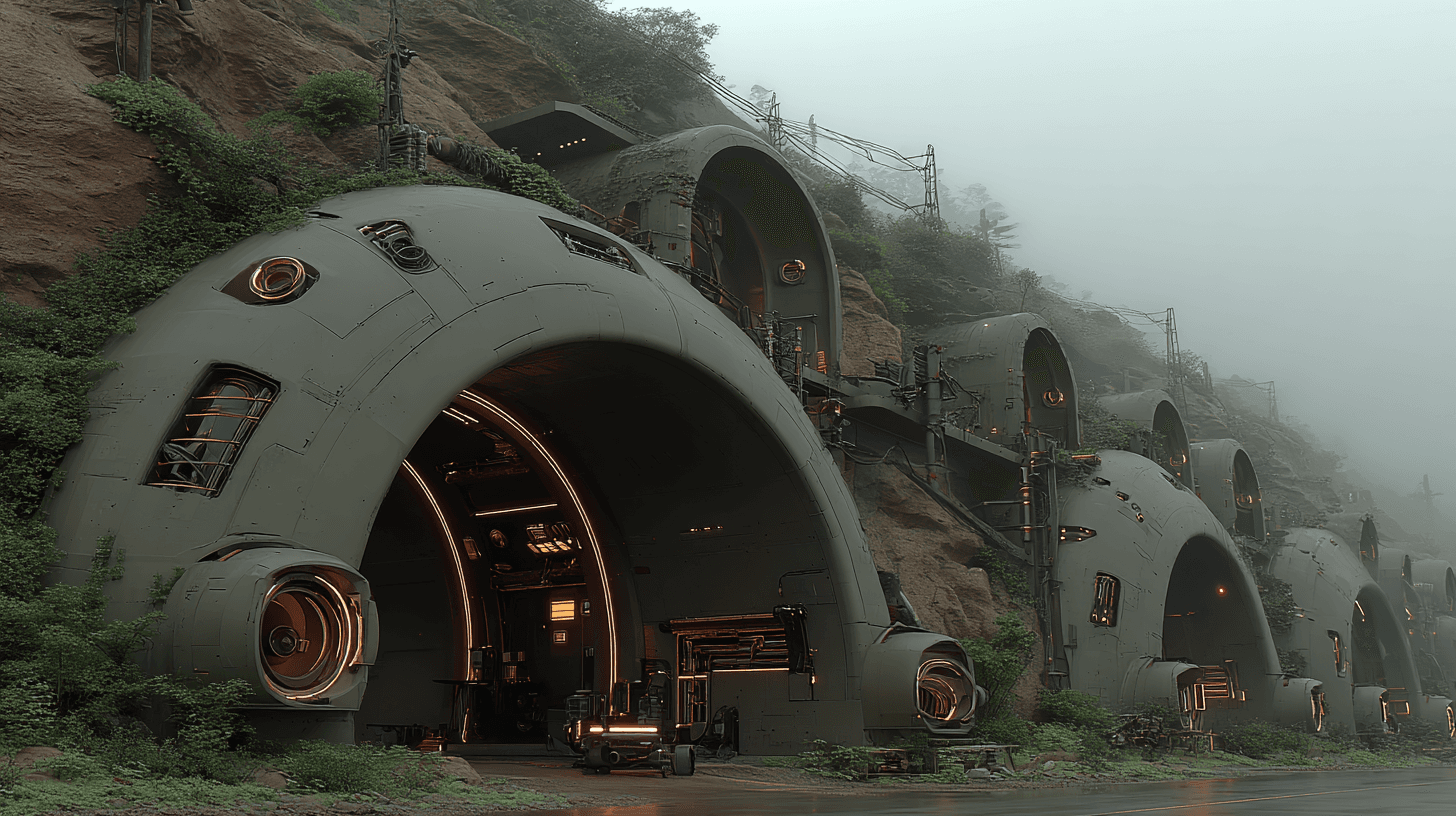
Die Szene gibt dem Video Look und Situation vor. Midjourney-Prompt:
deep stone cyberpunk workshop carved into the mountain, multiple unfinished energy strings resembling a laser whip, in various states of construction - geodesic interlocking lattices of brushed iron alloy with embedded copper-tone coil work, each whip approximately 5 meters in lenght fixed in articulated stone-and-iron rigs, no digital interfaces only mechanical gauges and engraved tolerance markings, photographic realism, anamorphic medium shot
Typische Fehler
- Ein einzelnes Foto statt Character Sheet. Die Figur wird dann von Shot zu Shot inkonsistent. Mehrere Ansichten geben dem Agenten Halt.
- Keine Szene mitgeben. Ohne Szenenbild rät der Agent den Look. Mit Szene hat er eine klare Vorgabe.
- Sofort auf Go, ohne die Interpretation zu prüfen. Der Vorschlag ist ein Startpunkt, kein Endergebnis. Zwei Minuten Feintuning sparen dir einen kompletten Fehldurchlauf.
- Das Ergebnis nur konsumieren. Der eigentliche Wert steckt im Nachverfolgen. Wer nur das fertige Video nimmt, verschenkt den Lerneffekt.
Next Steps
- Pollo AI öffnen und einen kostenlosen Testlauf mit einem Charakter machen
- Character Sheet vorbereiten, mehrere Ansichten derselben Figur
- Ein Szenenbild für Look und Situation dazulegen
- Ersten Durchlauf starten und bewusst in die Interpretation eingreifen
- Entscheidungen des Agenten durchgehen und eine davon beim nächsten Mal selbst setzen